Steps for using word to help with your bibliography formatting
Are you tired of wading through long lists of sources or shuffling through index cards to create your citations and bibliography in Word? Do you have a deadline to meet and can't spend hours manually formatting your APA references? Students, academics, and researchers—did you know that you can create a bibliography using Word 2007 and 2010? You can also format in-text citations, insert footnotes/endnotes, and manage your sources. In fact, all you have to do is input the information and let Word take care of the rest.
In-text citations
When creating a bibliography using Word, the first step is to decide which style to use (e.g., APA, MLA, or Turabian). Then, go to the References tab and choose it from the drop-down menu.
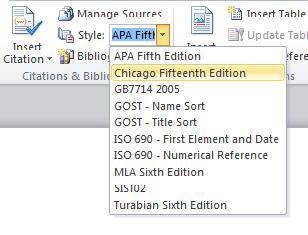
Unfortunately, if you need a style that's not on the list, it's not as easy to automatically reference or create a bibliography using Word. If you are confident in your XML skills, you can create your own XML file in C:\Program Files\Microsoft Office\Office14\Bibliography\Style (see the Microsoft blog for detailed instructions). For the rest of us, some styles, including Vancouver, IEEE, AMA, and Harvard (UK), are available for download from BibWord (they're free!). But for the purpose of this article, let's assume that you're using the Chicago Manual of Style.
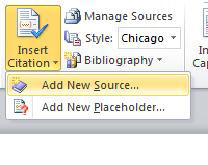
You're typing along and want to add a citation. First, put the cursor at the end of the sentence and then go to Insert Citation and Add New Source.
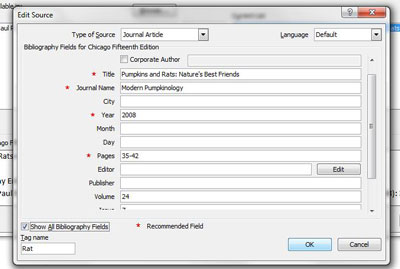
Complete the source form. To add more information, click on Show All Bibliography Fields at the bottom left.
The next time you want to reference the source, it will be available to you when you choose Insert Citation.
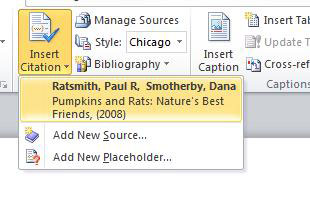
If you don't have all the necessary information to create an entire bibliography, or are in a hurry and just want to mark where to put the citation, you can choose Add New Placeholder under Insert Citation and come back later to complete the form.
Footnotes
Inserting footnotes and endnotes really couldn't be easier. All you have to do is click on Insert Footnote—these are automatically numbered/updated as you edit the text—or Insert Endnote and start typing.
Managing sources
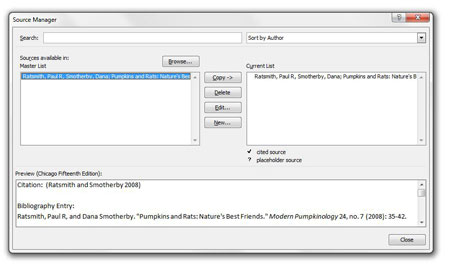
The Source Manager lets you add, delete, and edit sources; it is also where you go to complete your placeholders and is a great help when it comes to creating your bibliography. Word stores every source that you've ever entered, which can be handy, especially if you reuse your sources in, say, both your research proposal and academic essay. To create a current list from the master list, just go to Manage Sources and copy, delete, and edit as necessary. Also, note that the sources have a check mark in front, but the placeholders have a question mark, reminding you to add the missing information. You can even see a preview in the window at the bottom of the Source Manager.
Creating a bibliography using word
After you have all your data entered, you'll want to create the bibliography. Again, it's simple. Just put your cursor where you want it, and click on Bibliography.
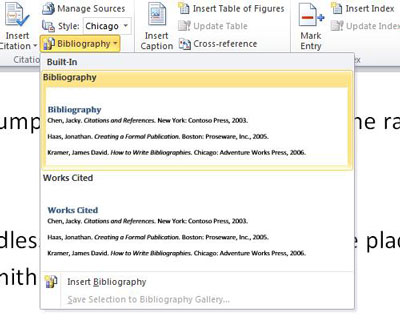
Voila! It appears. Overall, formatting your references and creating your bibliography using Word is a great time saver and spares you the hassle of having to input your sources manually every time, for every paper.
To ensure all your references are properly formatted according to your style guide, be sure to send it to the professionals at Scribendi for a thorough essay edit before submitting it to your professor.
Image source: Stanley Dai/Stocksnap.io

